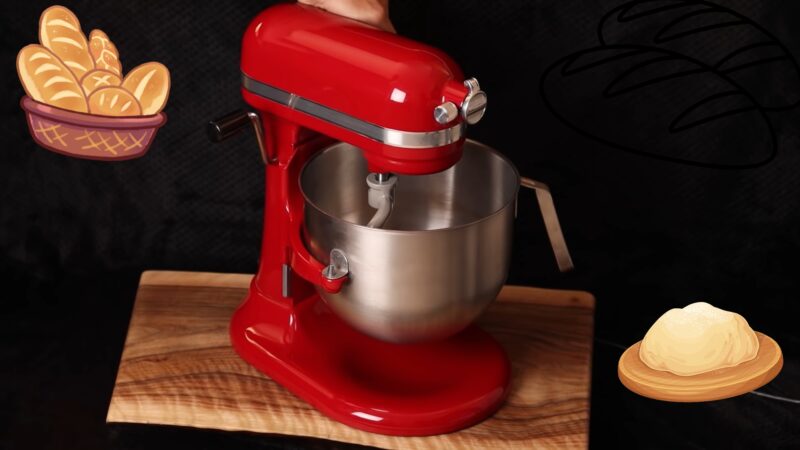
Hello, fellow bread enthusiasts! I’m a seasoned baker with more than a decade of experience kneading, proofing, and baking delicious loaves of bread. Today, I want to share with you an incredibly effective technique to simplify your bread-making process: using a dough hook.
For those who’ve been kneading bread dough by hand, transitioning to a dough hook can be an absolute game-changer. While preserving the art of traditional bread-making, a dough hook reduces the physical strain and saves precious time. So let’s break down the process into easy-to-follow steps and embark on this exciting journey of bread-making!
The Basics of Using a Dough Hook
Before diving into actual bread-making, let’s clarify the basics of using a dough hook. This tool, often overlooked by beginners, can be one of the most valuable allies in your baking endeavors.
Dough hooks are standard attachments on most modern stand mixers. They come in various shapes and sizes, but their purpose remains the same: to mimic the kneading process that develops the gluten in your dough.
- Why use a dough hook: A dough hook saves time and energy by automating the kneading process. It does the heavy lifting for you, allowing the gluten in the dough to develop without the need for manual labor.
- Choosing the right dough hook: There are different types of dough hooks available—C-shaped, Spiral, and Powerknead—each having their strengths and applications. Choose the one that suits your mixer model and the type of dough you intend to make.
Getting to Know Your Mixer
Once you’ve acquainted yourself with the dough hook, it’s time to understand your mixer better. After all, the mixer and dough hook work as a team to produce the best possible dough.
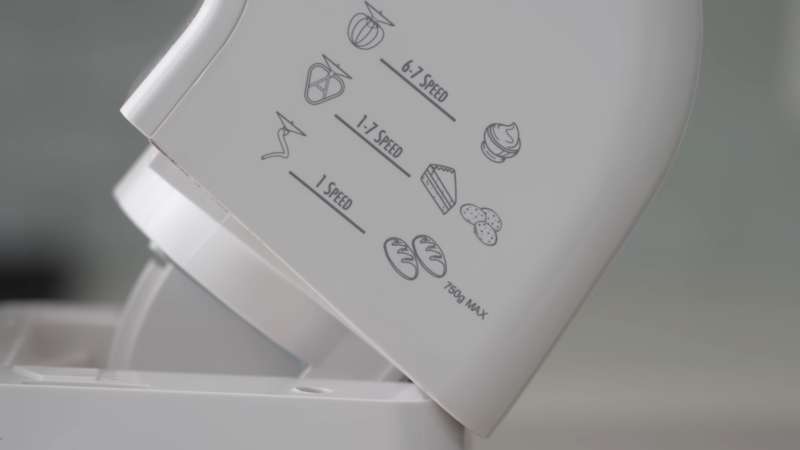
- Speed Settings: Not all doughs require the same mixing speed. While softer doughs might require a higher speed, heavier doughs, like whole wheat, need a slower, steadier pace. A general rule of thumb is to start slow and gradually increase the speed, but never exceed the mid-point.
- Capacity: Be mindful of your mixer’s capacity. Overloading it can lead to ineffective mixing and even damage your machine. As a general guideline, most home mixers can comfortably handle dough made from 500g to 1kg of flour.
The Bread-making Process
Now that we’ve understood our tools, let’s get into the exciting part—the actual bread-making process. By using a dough hook, we can simplify this process into five main stages.
Mixing Ingredients
The first step in making bread is mixing the ingredients. The order of ingredients added can vary depending on the recipe, but a common method is to combine the dry ingredients first, followed by the wet ones.
- Combining dry ingredients: Add your flour, salt, sugar, and yeast (if using instant yeast) to the mixer bowl. Using the paddle attachment, mix these ingredients on low speed until well combined.
- Adding wet ingredients: While your mixer is still running on low speed, slowly add your wet ingredients (water, milk, eggs, etc.), ensuring they are well incorporated into the dough.
Remember, the key to good dough is balance. You want your dough to be well-hydrated but not too sticky. It’s a fine line, and you may need a few tries to get it just right.
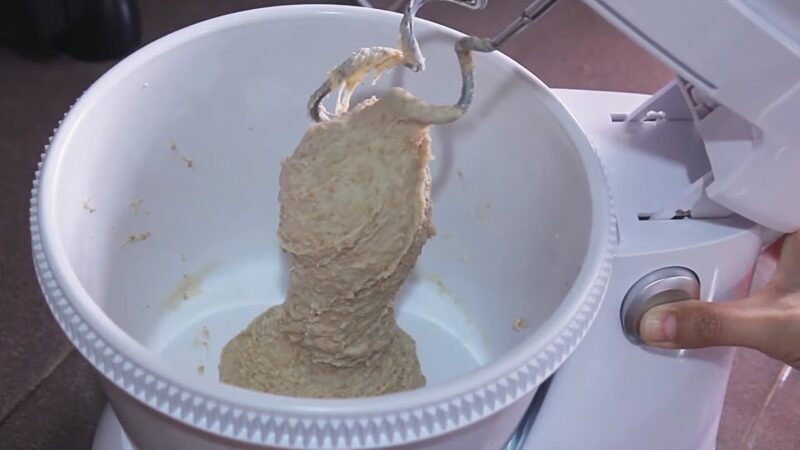
Kneading with the Dough Hook
Once you’ve mixed your ingredients, it’s time for the dough hook to work its magic. Kneading with a dough hook can seem a little tricky at first, but with practice, it becomes second nature.
- Attach the dough hook: Remove the paddle attachment from your mixer and replace it with the dough hook.
- Start kneading: Set your mixer to a slow speed to start kneading the dough. As the dough comes together, you can gradually increase the speed. Remember, patience is key here—over-kneading can lead to tough bread while under-kneading can result in a dough that doesn’t rise properly.
- Check the dough: After about 5-10 minutes of kneading, check your dough. It should be smooth, elastic, and slightly tacky to the touch but not overly sticky.
After Kneading: Proofing, Shaping, and Baking
With the kneading out of the way, we are ready to move into the next stages of bread-making.
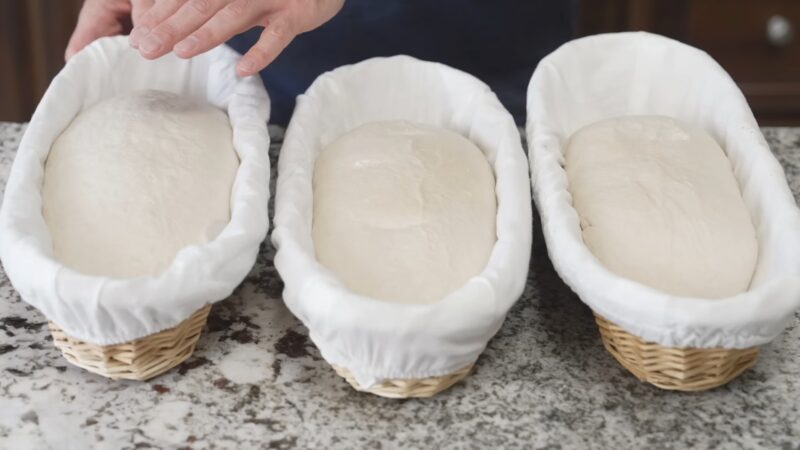
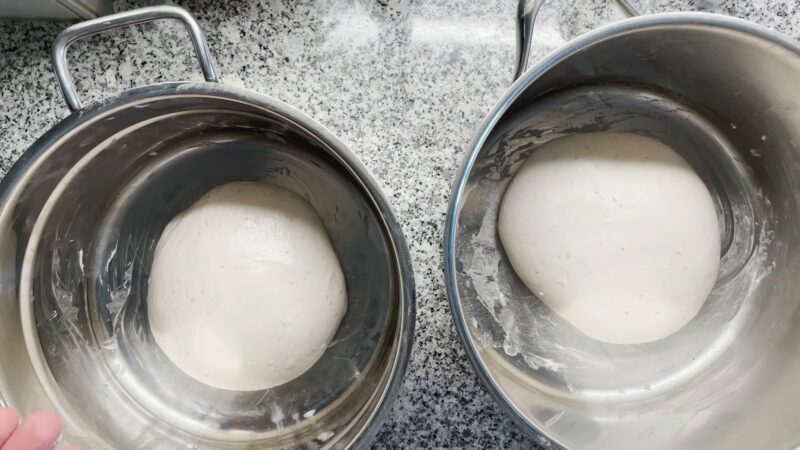
Proofing the Dough
Proofing, also known as rising, is a crucial stage in bread-making. It’s during this time that the yeast ferments the dough, producing carbon dioxide that makes the dough rise and imparting the bread its characteristic flavor.
- First Proofing: Once your dough is kneaded, place it in a lightly greased bowl, cover it with a damp cloth, and let it rise until it has doubled in size. This process can take anywhere from 1 to 2 hours, depending on the temperature and humidity of your environment.
- Punch Down and Second Proofing: After the dough has doubled, gently deflate it by pushing down the center and folding the dough over onto itself a few times. Then, shape the dough as per your recipe, place it in a baking pan or basket, and allow it to rise for the second time.
Baking Your Bread
The final step, baking, is where all your hard work comes to fruition.
- Preheating: Before you start baking, preheat your oven. A hot oven is critical for achieving a good oven spring (the rapid rise of dough in the oven).
- Scoring: Just before baking, make shallow cuts on the surface of your loaf using a sharp knife or a bread lame. This step, known as scoring, allows the bread to expand during baking and gives the loaf an attractive finish.
- Baking: Bake your bread as per your recipe’s instructions. Depending on the type and size of your loaf, this can take anywhere from 20 minutes to an hour.
FAQs
What ingredients do I need to make dough for bread?
The ingredients needed for making dough will depend on the type of dough you’re making. However, a basic recipe will include yeast, warm water, salt, flour, vegetable oil or butter, and sugar.
What is the difference between using a dough hook and hand kneading?
The biggest difference between using a dough hook to knead instead of kneading by hand is the amount of physical effort and time it takes. While manually kneading dough can take upwards of 20 minutes, you can get your dough smooth and elastic in about half the time with a stand mixer.
What speed should I use for a dough hook?
For best results, you should only use speed 2. Using a lower speed won’t provide enough momentum to knead the dough properly, and a higher speed may quickly overwork the dough.
How long should I knead the dough with a dough hook?
How long you should knead it will depend on the recipe you’re making. Some recipes that take 10-12 minutes to knead can be accomplished in just 2 minutes with a stand mixer.
How do I know when my dough is ready?
You’ll know that your dough is ready when it forms a smooth ball and nothing sticks to the side of the mixing bowl. In addition, once you have some experience, you can do what I prefer doing, which is “the poke test”.
What should I be careful about when using a dough hook?
Keep an eye while mixing so you don’t over-knead your dough. Also, you’ll need exact measurements, so use a scale to make sure you have the right amount of flour and ingredients.
Can I overfill my bowl when using a dough hook?
It is not recommended to overfill your bowl for best results and thorough mixing of all your ingredients.
Can I make other types of dough using a dough hook?
Yes, you can use it to make various types of dough, such as pasta dough or pizza dough. The process will be similar to making bread dough.
Final Words
And there you have it! By using a dough hook and understanding the fundamental stages of bread-making, you can create delicious homemade bread with relative ease.